 |
 +++ Modeling/Conversion Tips and Tricks
[Continued]
| Gluing |
| > | For more precise control of glue application, coil a piece of thin wire around a toothpick, with the wire coming off of one end. Put a pile of superglue or white glue on a piece of paper and dip the wire into the glue. As the wire gets crusty, snip off the tip and uncoil a bit more from the rod. |
| > | Tape up (w/masking tape) model parts before gluing to check the fit. When satisfactory, apply superglue along the outside of seams. When dry, sand smooth. This method not only binds the pieces, but it (after sanding) removes any evidence of a seam. Great for things like oil drums which look queer with that big seam across the top. |
| > | Fill small gaps in models with white glue. Apply glue with wire applicator (in small doses so that a skin doesn't form) and then smooth out glue with a moistened cotton swab. |

| Painting Tips |
| > | Take pots of Citadel paint to your local paint store. Have them match acrylic house paint to Citadel colors. This is better for large terrain coverage (Chaos Black, Goblin Green, Codex Grey, etc.) than for use on figures. Miniature paint is especially formulated for miniature use, so the properties of the paint are slightly different. |
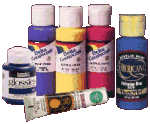
| > | Don't be afraid to experiment with other brands of acrylic modeling and craft paints. One brand, called Plaid, that's sold in many craft stores and craft areas of department stores has been reported by some modelers to be nearly indistinguishable from Citadel Colours. The paints cost from US$.50 - $.90 for 2 Oz. (up to four times the amount of Citadel paint) and they're slightly thicker, so they go even farther (once to water them down). |
| > | Save small clear plastic sauce containers from take-out food. They're great for mixing paint, glue and sand mixture, holding basing flock, etc. With lids, paints, etc. can be stored without drying out. |
| > | BlueTac can be used to temporarily hold models and bitz to cardboard or other painting surfaces. BlueTac can be found in most stationary stores. It's designed to attach posters to walls without (allegedly) marring them. You can also use a tiny ball of BlueTac to keep doors closed on vehicles that are prone to opening. |
| > | Paint stirring sticks (usually free at paint and home stores) make great holders of small bits while you paint them. Use BlueTac or two-way tape to hold the items down while you paint. |
| > | Silly Putty can be used for quick-and-dirty masking/frisket material. Put it on the areas you don't want painted. It will remove without leaving any residue. Works for both brush and airbrush work. |
| > | There are all sorts of "family recipes" for stripping off old paint. Spic 'n' Span in warm water is one of them. It'll remove acrylic paint from plastic models within a few hours, and takes enamels off if left on overnight. Some swear by Easy-Off oven cleaner. PineSol is another popular method (for use on metal minis only). Experiment with any of these before you subject your good minis and follow all safety precautions. |
| > | A quick and dirty way of transfering paint from a pot to a palette or mixing cup is to use an old large-bristled brush. Since you don't have to be fussy about the brush, you can really load it up with paint and then scrape it off on the side of the cup. Just make sure to thoroughly clean the brush before grabbing paint from another pot. |
| > | If you have trouble (like we do) keeping track of which Citadel paints you have on hand, print out the Citadel Paint Chart on the Games Workshop site and use the order boxes in front of each color to inventory what you have and need. |
| Tool Tips |
| > | Paper clamps make great no-budget spring clamps. Make sure to place card or something else between your work and the clamp jaws so that you don't mare the surface of your model. Clothes pins make good glue clamps too. |
| > | Shop the beauty isle of your local drug store! In the manicure section, you'll find all sorts of sanding supplies. Get yourself a four-way sanding file, which has four grits for sanding and buffing. They even often have small, spongey wet-dry sanding blocks! And manicure scissors make a great modeling tool too. |
| > | A walnut cracker, the kind that has curved jaws, makes an excellent bottle opener for stubborn paint and glue pots. Just be careful that you don't crush the crap out of the bottle. |
| > | A large old butcher block or cutting board makes a great modeling surface. You can cut on it, paint on it, tack things down to it. Once it gets all funky, just get out the ol' belt sander and make yourself a new modeling surface! |
| > | A fabric cutting wheel (about ten bucks in a fabric store) is a very useful tool for cutting thin card and styrene sheeting. The blade is very sharp and teamed up with a steel ruler, will produce perfect and quick cuts. |
| Sprues |
| > | Save those sprues! These can be used for all sorts of modeling bitz and test subjects for experimenting with new painting and modeling techniques. |
| > | You can "re-size" sprue plastic by heating it over a candle and pulling on it. With practice, you can even bend it to form rings, rounded rectangles and other useful shapes (for making buttons, belt buckles, pack clasps, etc.). Be careful! The fumes are noxious and you don't want to set the plastic to flame. Have a water plunge nearby incase the plastic does catch on fire. You need to hold the sprue plastic far enough from the flame so that the plastic gets soft but doesn't smoke or catch fire. This technique, mastered by many a military modeler, is a real art and takes some talent. We can't stress enough how dangerous this is. You should probably learn outside first, and if you're a kid, you shouldn't think about doing this without adult supervision. |
| > | You can make a handy glue applicator tool from sprue. Stretch a pencil-length of sprue using the above method, pulling on one end until it's very narrow. Sand the narrow tip to a point. Now you have a tool for precise glue application. Sand excess glue from the end when needed. As the tip gets gunky, re-heat and re-stretch. |
| > | Sprue is great for holding small parts for painting. When I did my Falcon Grav Tank, I glued the head/torso of the pilot and gunner (with a spot of white glue) to the end of a straight piece of sprue. After painting, the torsos snapped right off. |

Decaling secrets found on the Apocrypha websize (see below).
| Useful Modeling Articles Online |
| > | A Step-by-Step Guide to Applying Decals -- A really nice piece on decaling, with great images, on the always top-shelf Apocrypha webzine. The entire Modelcraft archive is highly recommended for cool modeling and conversion articles.
|
| > | Make Your Own Decals 101 -- This model rocketry site has a downloadable .doc file that tells you pretty much everything you need to know about creating your own water slide transfers. They even sell the blank water slide paper if you want. |
| > | Green Stuff, Sculpty and Details Galore -- Excellent article on Apocrypha about sculpting details onto your models. |
|
|
 |
 |


